보안 연결 실패

hostname:8006에 연결하는 동안 오류가 발생했습니다. PR_END_OF_FILE_ERROR

오류 코드: PR_END_OF_FILE_ERROR

    받은 데이터의 신뢰성을 확인할 수 없으므로 보시려는 페이지를 표시할 수 없습니다.
    웹 사이트 관리자에게 연락하여 이 문제를 알려주실 수 있습니다.
ssh 접속이 가능하다면 아래 명령어 실행
cd /etc/pve/local ; rm pve*ssl.* ; pvecm updatecerts --force ; service pveproxy restart
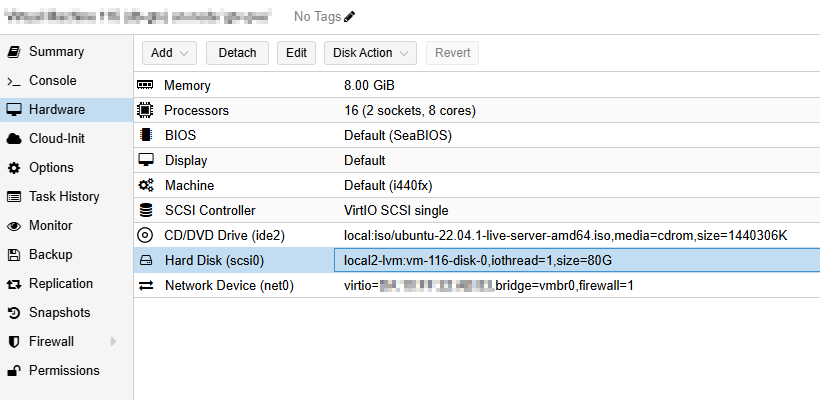
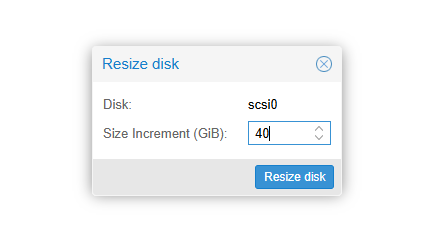
root@db-gtv:~# resize2fs /dev/sda2
resize2fs 1.46.5 (30-Dec-2021)
Filesystem at /dev/sda2 is mounted on /; on-line resizing required
old_desc_blocks = 10, new_desc_blocks = 15
The filesystem on /dev/sda2 is now 31456763 (4k) blocks long.
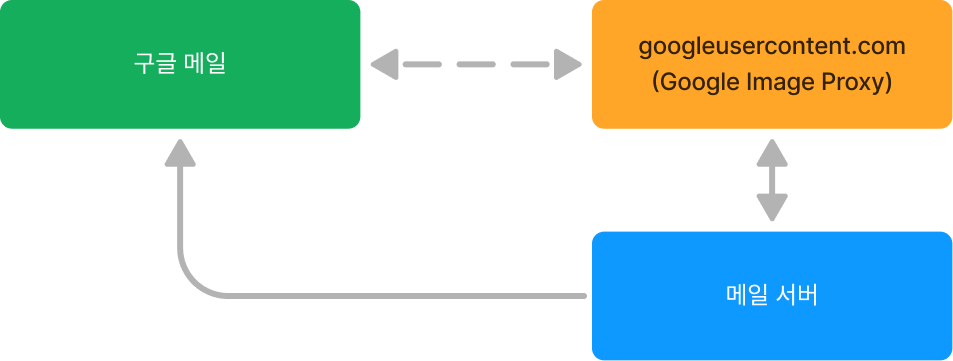
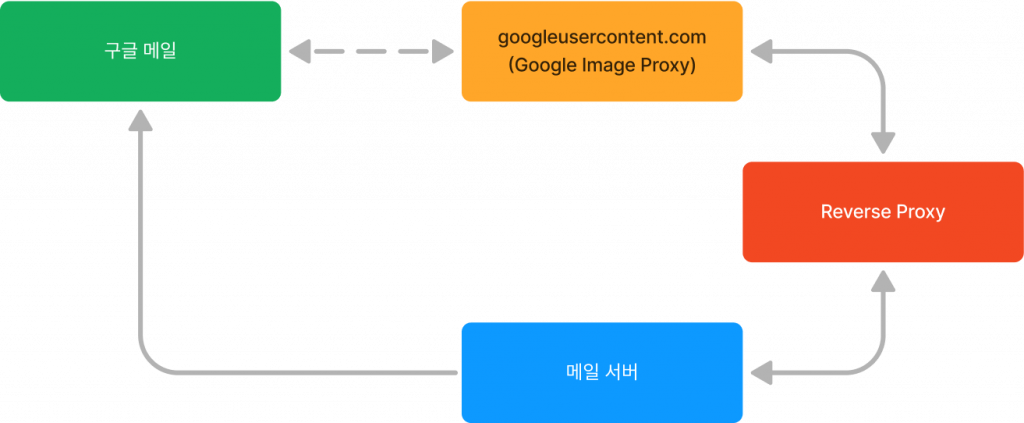
RemoteIPHeader X-Forwarded-For : 사용자는 haproxy를 통해서 웹서버에 접근하기 때문에 실제 웹서버 로그에는 haproxy 아이피가 나온다. 이때 haproxy는 X-Forwarded-For 헤더에 클라이언트의 실제아이피를 담아준다. mod_remoteip 모듈을 활성화하고 해당 옵션을 이용하면 아파치가 실제 클라이언트 아이피를 가져올 수 있다. PHP의 경우 REMOTE_ADDR 값에 영향을 준다.
RemoteIPInternalProxy : haproxy 아이피 대역을 입력한다.
mod_remoteip 활성화하기
a2enmod remoteip
PEM 인증서 생성하기
key, crt 파일을 이용해서 pem 형식의 인증서를 만드는 방법이다. 합친파일에서 ^M 문자열이 있을 경우 오류가 나기 때문에 tr 명령을 이용해서 삭제해준다.