CodeSign TimeStamp URL
http://sha256timestamp.ws.symantec.com/sha256/timestamp
http://sha1timestamp.ws.symantec.com/sha1/timestamp
DigiCert Trusted G4 Code Signing
http://timestamp.globalsign.com/tsa/r6advanced1
Hello world

http://sha256timestamp.ws.symantec.com/sha256/timestamp
http://sha1timestamp.ws.symantec.com/sha1/timestamp
http://timestamp.globalsign.com/tsa/r6advanced1
HAProxy + MariaDB Galera Cluster 구성을 하고 테스트를 진행하니 문제가 발생해서 글을 남겨본다.
haproxy.cfg 설정파일에서 아래 옵션을 사용
option mysql-check user haproxy이 옵션은 TCP 포트로의 접속가능 여부만 판단해서 health check를 한다.
Galera Cluster의 경우 노드가 복구될 때 쿼리를 하면 아래 메시지가 출력된다.
WSREP has not yet prepared node for application use따라서 이 경우는 HAProxy에서 노드를 살려줘서는 안된다.
MariaDB [(none)] > show global status where variable_name='wsrep_local_state';
+-------------------+-------+
| Variable_name     | Value |
+-------------------+-------+
| wsrep_local_state | 4     |
+-------------------+-------+
동기화가 완료되서 사용이 가능한 상태값이다.
다른 상태값은 아래 링크에서 확인한다.
https://mariadb.com/docs/ent/ref/mdb/status-variables/wsrep_local_state/
기존에 mysql-check를 외부 스크립트를 이용하도록 변경한다.
외부 스크립트는 wsrep_local_state 값을 읽어서 원하는 값이면 exit 0 을 리턴하고 다른값이면 exit 255를 리턴시켜주면 된다.
/etc/haproxy/haproxy.cfg
global
        log /dev/log    local0
        log /dev/log    local1 notice
        stats socket /run/haproxy/admin.sock mode 660 level admin expose-fd listeners
        stats timeout 30s
        user haproxy
        group haproxy
        daemon
        external-check
        insecure-setuid-wanted

frontend mysql-front
        bind *:3306
        mode tcp
        default_backend mysql-back

backend mysql-back
        mode tcp
	#option mysql-check user haproxy
	option external-check
        external-check path "/usr/bin:/bin"
        external-check command /etc/haproxy/script/check_node.sh
	balance roundrobin
        server db1 172.16.0.20:3306 check
        server db2 172.16.0.21:3306 check backup weight 2
server db3 172.16.0.22:3306 check backup weight 1/etc/haproxy/script/check_node.sh
#!/bin/bash

MYSQL_HOST="$3"
MYSQL_PORT="$4"
MYSQL_USERNAME="haproxy"
MYSQL_PASSWORD=""
MYSQL_BIN="/bin/mysql"
MYSQL_OPTS="--no-defaults --connect-timeout=10 -snNE"
CMDLINE="$MYSQL_BIN $MYSQL_OPTS --host=$MYSQL_HOST --port=$MYSQL_PORT --user=$MYSQL_USERNAME -e"
WSREP_LOCAL_STATE_CHK=`$CMDLINE "SHOW GLOBAL STATUS WHERE VARIABLE_NAME='wsrep_local_state'" | tail -1`

if [ "$WSREP_LOCAL_STATE_CHK" != "4" ]; then
    exit 255
fi

exit 0
$1 = Virtual Service IP (VIP)
$2 = Virtual Service Port (VPT)
$3 = Real Server IP (RIP)
$4 = Real Server Port (RPT)
$5 = Check Source IP
$3, $4를 이용해서 노드의 상태를 읽는다.
우분투 20.04 에서 진행한다. 패키지관리자로 설치가 가능하다. SSL을 지원하는 2.x 버전이 설치된다.
apt install -y haproxyroot@haproxy1:~# haproxy --version
HA-Proxy version 2.0.29-0ubuntu1 2022/08/26 - https://haproxy.org/
Usage : haproxy [-f <cfgfile|cfgdir>]* [ -vdVD ] [ -n <maxconn> ] [ -N <maxpconn> ]
[ -p <pidfile> ] [ -m <max megs> ] [ -C <dir> ] [-- <cfgfile>*]
-v displays version ; -vv shows known build options.
-d enters debug mode ; -db only disables background mode.
-dM[<byte>] poisons memory with <byte> (defaults to 0x50)
-V enters verbose mode (disables quiet mode)
-D goes daemon ; -C changes to <dir> before loading files.
-W master-worker mode.
-Ws master-worker mode with systemd notify support.
-q quiet mode : don't display messages
-c check mode : only check config files and exit
-n sets the maximum total # of connections (uses ulimit -n)
-m limits the usable amount of memory (in MB)
-N sets the default, per-proxy maximum # of connections (0)
-L set local peer name (default to hostname)
-p writes pids of all children to this file
-de disables epoll() usage even when available
-dp disables poll() usage even when available
-dS disables splice usage (broken on old kernels)
-dG disables getaddrinfo() usage
-dR disables SO_REUSEPORT usage
-dr ignores server address resolution failures
-dV disables SSL verify on servers side
-sf/-st [pid ]* finishes/terminates old pids.
-x <unix_socket> get listening sockets from a unix socket
-S <bind>[,<bind options>...] new master CLI파일을 생성하거나 수정해야 한다. 각 HAProxy 노드별로 설정파일이 같다.
/etc/haproxy/haproxy.cfg
global
        log /dev/log    local0
        log /dev/log    local1 notice
        chroot /var/lib/haproxy
        stats socket /run/haproxy/admin.sock mode 660 level admin expose-fd listeners
        stats timeout 30s
        user haproxy
        group haproxy
        daemon

        # Default SSL material locations
        ca-base /etc/ssl/certs
        crt-base /etc/ssl/private

        # See: https://ssl-config.mozilla.org/#server=haproxy&server-version=2.0.3&config=intermediate
        ssl-default-bind-ciphers ECDHE-ECDSA-AES128-GCM-SHA256:ECDHE-RSA-AES128-GCM-SHA256:ECDHE-ECDSA-AES256-GCM-SHA384:ECDHE-RSA-AES256-GCM-SHA384:ECDHE-ECDSA-CHACHA20-POLY1305:ECDHE-RSA-CHACHA20-POLY1305:DHE-RSA-AES128-GCM-SHA256:DHE-RSA-AES256-GCM-SHA384
        ssl-default-bind-ciphersuites TLS_AES_128_GCM_SHA256:TLS_AES_256_GCM_SHA384:TLS_CHACHA20_POLY1305_SHA256
        ssl-default-bind-options ssl-min-ver TLSv1.2 no-tls-tickets

defaults
        log     global
        mode    http
        option  httplog
        option  dontlognull
        timeout connect 5000
        timeout client  50000
        timeout server  50000
        errorfile 400 /etc/haproxy/errors/400.http
        errorfile 403 /etc/haproxy/errors/403.http
        errorfile 408 /etc/haproxy/errors/408.http
        errorfile 500 /etc/haproxy/errors/500.http
        errorfile 502 /etc/haproxy/errors/502.http
        errorfile 503 /etc/haproxy/errors/503.http
        errorfile 504 /etc/haproxy/errors/504.http

listen stats
        bind *:8080
        stats enable
        stats uri /
        stats realm HAProxy\ Statistics
        stats auth admin:1234
        stats refresh 10s

frontend mysql-front
        bind *:3306
        mode tcp
        default_backend mysql-back

backend mysql-back
        mode tcp
        option mysql-check user haproxy
        balance roundrobin
        server db1 172.16.0.20:3306 check
        server db2 172.16.0.21:3306 check backup weight 2
        server db3 172.16.0.22:3306 check backup weight 1
이 설정은 db1 노드를 Active 상태로 두고 나머지는 stand-by한다. db1 노드에 장애가 발생하면 다음번 노드가 활성화된다.
백엔드에 입력된 노드상태 확인을 위해서 mysql 접근이 가능해야한다. 따라서 각 데이터베이스 노드에 haproxy 유저를 추가해준다.
MariaDB [(none)] > create user 'haproxy'@'172.16.0.%';HAProxy를 이중화하기 위해서 keepalived가 필요하다. VIP를 가지고 있다가 마스터 노드에 장애가 발생하면 슬래이브 노드에 VIP를 바인딩해준다.
apt install -y keepalived로컬 호스트주소외 다른 가상아이피를 바인딩할 수 있도록 설정을 변경해야 한다.
아래파일에 추가하거나 수정한다.
/etc/sysctl.conf
net.ipv4.ip_nonlocal_bind = 1root@haproxy1:/etc/keepalived# sysctl -p
net.ipv4.ip_nonlocal_bind = 1
/etc/keepalived/keepalived.conf
global_defs {
        router_id HAProxy1
}

vrrp_script check_haproxy {
        script "killall -0 haproxy"
        interval 2
        weight 2
}

vrrp_instance VIS_TEST {
        interface         eth0
        state             MASTER
        priority          101
        virtual_router_id 51
        advert_int        1

        virtual_ipaddress {
                172.16.0.5
        }

        track_script {
                check_haproxy
        }
}
/etc/keepalived/keepalived.conf
global_defs {
        router_id HAProxy2
}

vrrp_script check_haproxy {
        script "killall -0 haproxy"
        interval 2
        weight 2
}

vrrp_instance VIS_TEST {
        interface         eth0
        state             MASTER
        priority          100
        virtual_router_id 51
        advert_int        1

        virtual_ipaddress {
                172.16.0.5
        }

        track_script {
                check_haproxy
        }
}
router_id 값은 각 노드마다 다르다.
priority 값은 마스터가 값이 더 커야 한다.
virtual_ipaddress 값은 VIP로 마스터가 이 VIP를 바인딩하다 장애가 발생하면 다른 노드가 이 VIP를 바인딩해서 이중화가 가능하다.
systemctl restart keepalived.service1번 노드에 VIP가 바인딩된 것이 보인다. 1번노드에서 haproxy 서비스를 중지시키면 2번 노드에 VIP가 바인딩되는 것을 확인할 수 있다.
root@haproxy1:/etc/haproxy# ip a
2: eth0: <BROADCAST,MULTICAST,UP,LOWER_UP> mtu 1500 qdisc fq_codel state UP group default qlen 1000
    link/ether xx:xx:xx:xx:xx:xx brd ff:ff:ff:ff:ff:ff
    inet 172.16.0.10/24 brd 172.16.0.255 scope global eth0
       valid_lft forever preferred_lft forever
    inet 172.16.0.5/32 scope global eth0
       valid_lft forever preferred_lft forever
root@haproxy2:/etc/haproxy# ip a
2: eth0: <BROADCAST,MULTICAST,UP,LOWER_UP> mtu 1500 qdisc fq_codel state UP group default qlen 1000
    link/ether xx:xx:xx:xx:xx:xx brd ff:ff:ff:ff:ff:ff
    inet 172.16.0.11/24 brd 172.16.0.255 scope global eth0
       valid_lft forever preferred_lft forever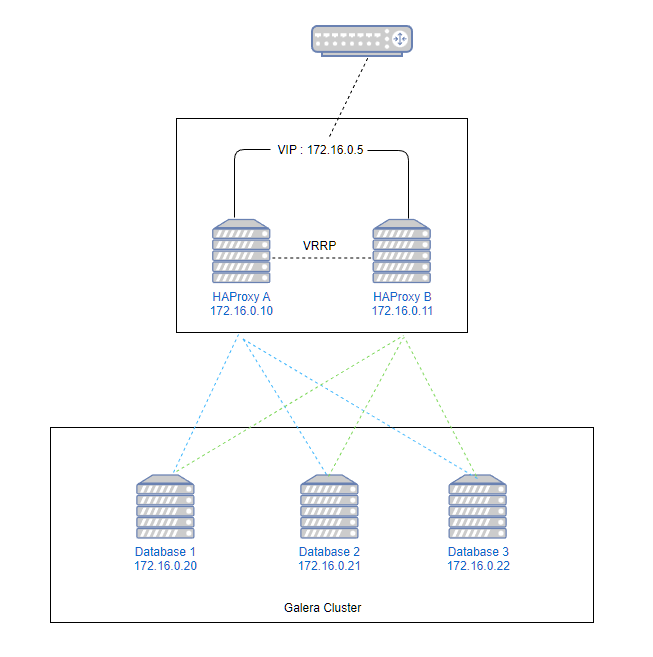
우분투 20.04 에서 진행한다. 패키지관리자에서 제공하는 mariadb-server를 설치하면 galera3이 같이 설치된다.
$ apt update && apt upgrade -y
$ apt install -y mariadb-server/etc/mysql/mariadb.conf.d/60-galera.cnf
[galera]
binlog_format=ROW
default-storage-engine=innodb
innodb_autoinc_lock_mode=2
bind-address=0.0.0.0

# Galera Provider Configuration
wsrep_on=ON
wsrep_provider=/usr/lib/galera/libgalera_smm.so

# Galera Cluster Configuration
wsrep_cluster_name="galera_cluster"
wsrep_cluster_address="gcomm://172.16.0.20,172.16.0.21,172.16.0.22"

# Galera Synchronization Configuration
wsrep_sst_method=rsync

# Galera Node Configuration
wsrep_node_address="172.16.0.20"
wsrep_node_name="node1"/etc/mysql/mariadb.conf.d/60-galera.cnf
[galera]
binlog_format=ROW
default-storage-engine=innodb
innodb_autoinc_lock_mode=2
bind-address=0.0.0.0

# Galera Provider Configuration
wsrep_on=ON
wsrep_provider=/usr/lib/galera/libgalera_smm.so

# Galera Cluster Configuration
wsrep_cluster_name="galera_cluster"
wsrep_cluster_address="gcomm://172.16.0.20,172.16.0.21,172.16.0.22"

# Galera Synchronization Configuration
wsrep_sst_method=rsync

# Galera Node Configuration
wsrep_node_address="172.16.0.21"
wsrep_node_name="node2"/etc/mysql/mariadb.conf.d/60-galera.cnf
[galera]
binlog_format=ROW
default-storage-engine=innodb
innodb_autoinc_lock_mode=2
bind-address=0.0.0.0

# Galera Provider Configuration
wsrep_on=ON
wsrep_provider=/usr/lib/galera/libgalera_smm.so

# Galera Cluster Configuration
wsrep_cluster_name="galera_cluster"
wsrep_cluster_address="gcomm://172.16.0.20,172.16.0.21,172.16.0.22"

# Galera Synchronization Configuration
wsrep_sst_method=rsync

# Galera Node Configuration
wsrep_node_address="172.16.0.22"
wsrep_node_name="node3"첫번째 노드에서 실행한다
$ galera_new_cluster각 노드별로 실행해준다
$ systemctl restart mariadb.service클러스터 상태 확인
$ mysql -uroot -pMariaDB [(none)] > show status like 'wsreq%';
+-------------------------------+----------------------------------------------------------+
| Variable_name | Value |
+-------------------------------+----------------------------------------------------------+
| wsrep_applier_thread_count | 1 |
| wsrep_apply_oooe | 0.000000 |
| wsrep_apply_oool | 0.000000 |
| wsrep_apply_window | 1.000000 |
| wsrep_causal_reads | 0 |
| wsrep_cert_deps_distance | 95.038207 |
| wsrep_cert_index_size | 106 |
| wsrep_cert_interval | 0.000000 |
| wsrep_cluster_conf_id | 22 |
| wsrep_cluster_size | 3 |
| wsrep_cluster_state_uuid | 2f9b1216-670b-11ed-a410-02c6026a7d9b |
| wsrep_cluster_status | Primary |
| wsrep_cluster_weight | 3 |
| wsrep_commit_oooe | 0.000000 |
| wsrep_commit_oool | 0.000000 |
| wsrep_commit_window | 1.000000 |
| wsrep_connected | ON |
| wsrep_desync_count | 0 |
| wsrep_evs_delayed | |
| wsrep_evs_evict_list | |
| wsrep_evs_repl_latency | 0.00183486/0.00210722/0.00237959/0.000272366/2 |
| wsrep_evs_state | OPERATIONAL |
| wsrep_flow_control_paused | 0.000068 |
| wsrep_flow_control_paused_ns | 395662483 |
| wsrep_flow_control_recv | 15 |
| wsrep_flow_control_sent | 1 |
| wsrep_gcomm_uuid | 9ca4e10d-6a23-11ed-9e58-135c9b8d1ba7 |
| wsrep_incoming_addresses | 172.16.0.20:3306,172.16.0.21:3306,172.16.0.22:3306 |
| wsrep_last_committed | 1941702 |
| wsrep_local_bf_aborts | 0 |
| wsrep_local_cached_downto | 1885300 |
| wsrep_local_cert_failures | 0 |
| wsrep_local_commits | 0 |
| wsrep_local_index | 1 |
| wsrep_local_recv_queue | 0 |
| wsrep_local_recv_queue_avg | 0.401237 |
| wsrep_local_recv_queue_max | 110 |
| wsrep_local_recv_queue_min | 0 |
| wsrep_local_replays | 0 |
| wsrep_local_send_queue | 0 |
| wsrep_local_send_queue_avg | 0.000000 |
| wsrep_local_send_queue_max | 1 |
| wsrep_local_send_queue_min | 0 |
| wsrep_local_state | 4 |
| wsrep_local_state_comment | Synced |
| wsrep_local_state_uuid | 2f9b1216-670b-11ed-a410-02c6026a7d9b |
| wsrep_open_connections | 0 |
| wsrep_open_transactions | 0 |
| wsrep_protocol_version | 9 |
| wsrep_provider_name | Galera |
| wsrep_provider_vendor | Codership Oy <info@codership.com> |
| wsrep_provider_version | 3.29(ra60e019) |
| wsrep_ready | ON |
| wsrep_received | 57714 |
| wsrep_received_bytes | 17158682 |
| wsrep_repl_data_bytes | 0 |
| wsrep_repl_keys | 0 |
| wsrep_repl_keys_bytes | 0 |
| wsrep_repl_other_bytes | 0 |
| wsrep_replicated | 0 |
| wsrep_replicated_bytes | 0 |
| wsrep_rollbacker_thread_count | 1 |
| wsrep_thread_count | 2 |
+-------------------------------+----------------------------------------------------------+
wsrep_cluster_size : 클러스터에 가입된 있는 노드수
wsrep_incoming_addresses : 클러스터에 가입된 아이피
wsrep_local_state_comment : 현재 노드 상태 (다른 노드들과 데이터가 동기화되어 있는 상태면 Synced)
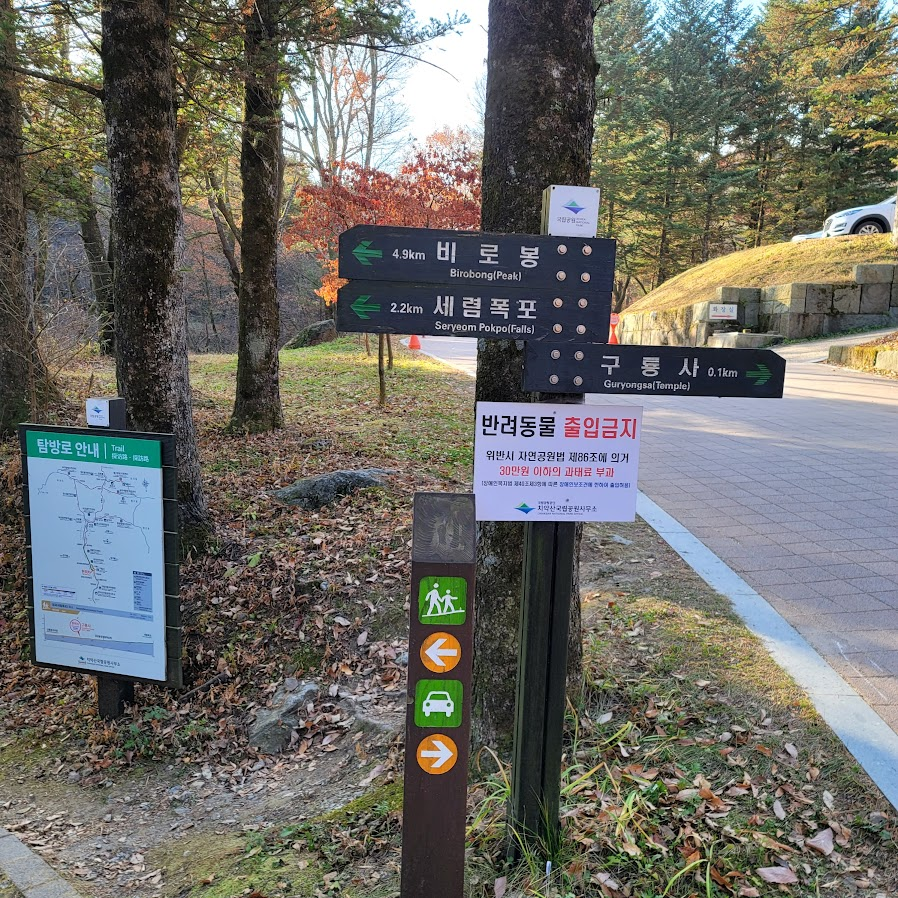
주차는 가능하면 신흥주차장에 한다.
구룡1주차장에서 오려면 셔틀을 타야하고 생각보다 멀다.
총거리 11.6km
정상에서 밥먹고 중간중간 쉬는 시간 포함해서 6시간 10분 소요됨


늦은 가을이라 그런지 단풍이 다 떨어졌네


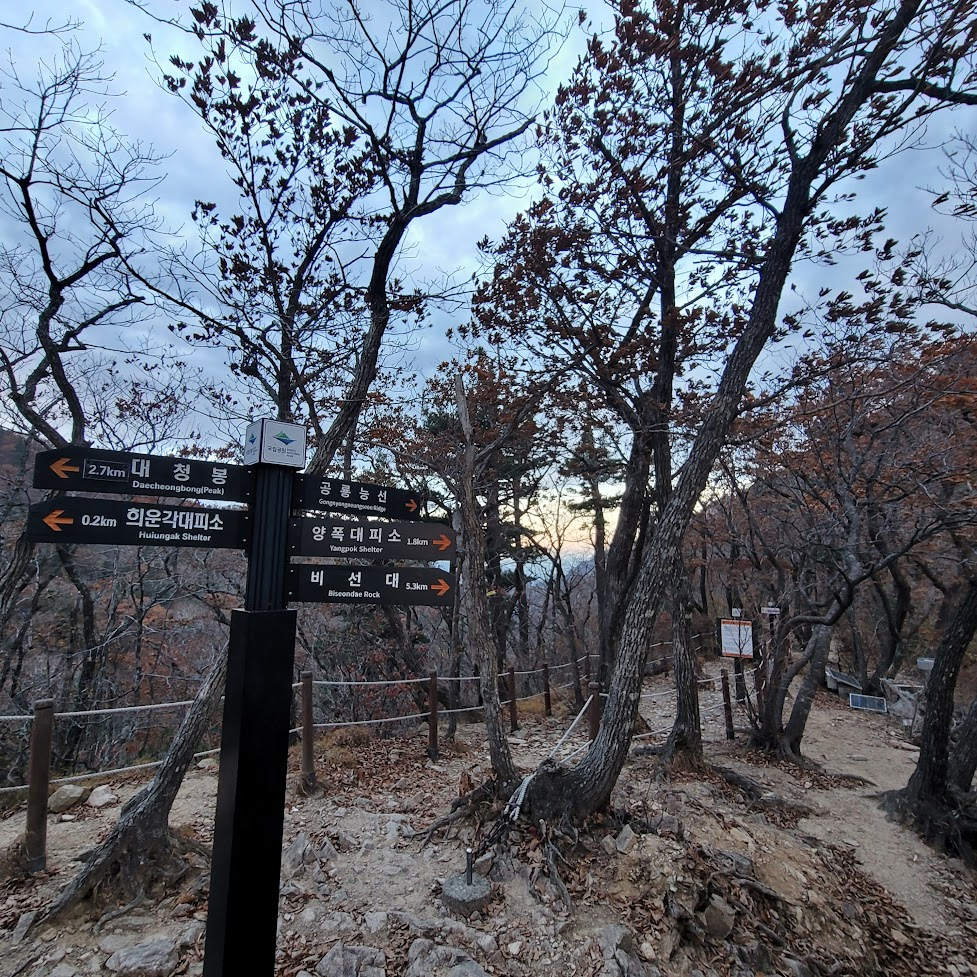
세렴폭포는 여기서 왼쪽으로 조금더 가야한다
입산통제 시간이 있으니 주의바람
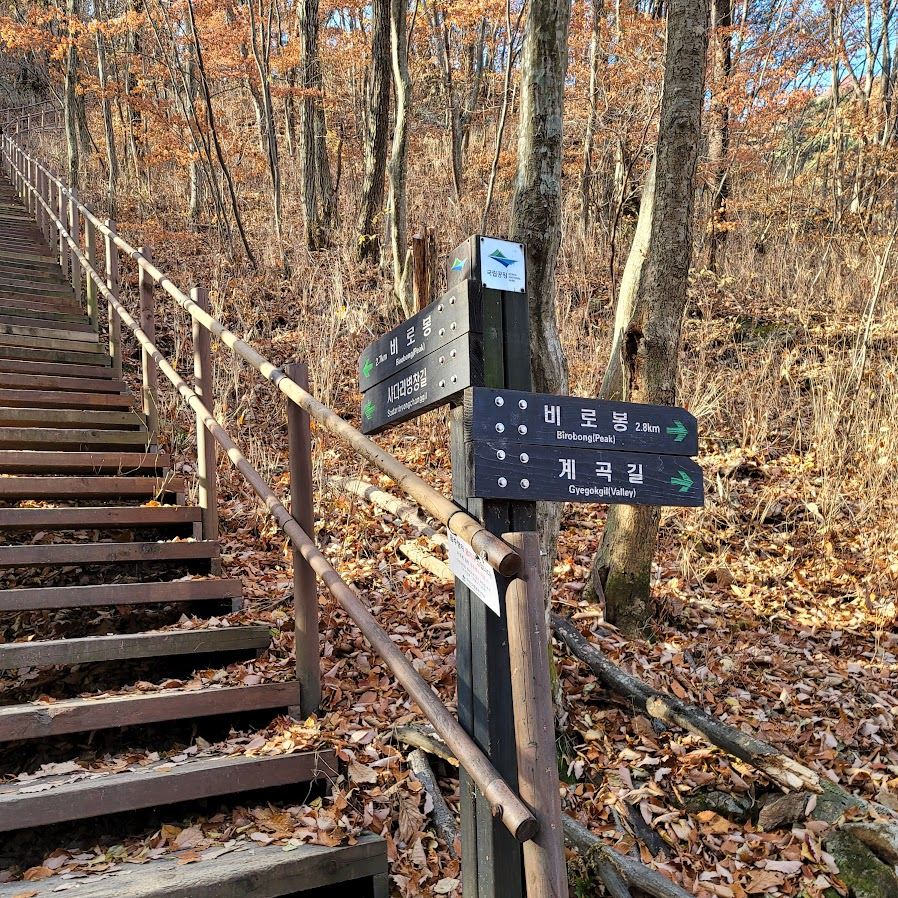
여기서 왼쪽이 사다리병장길 방향
오른쪽이 계곡길이다
사다리병장길로 올라가면 끝없는 계단이 기다린다
계곡길은 돌돌돌.. 돌..
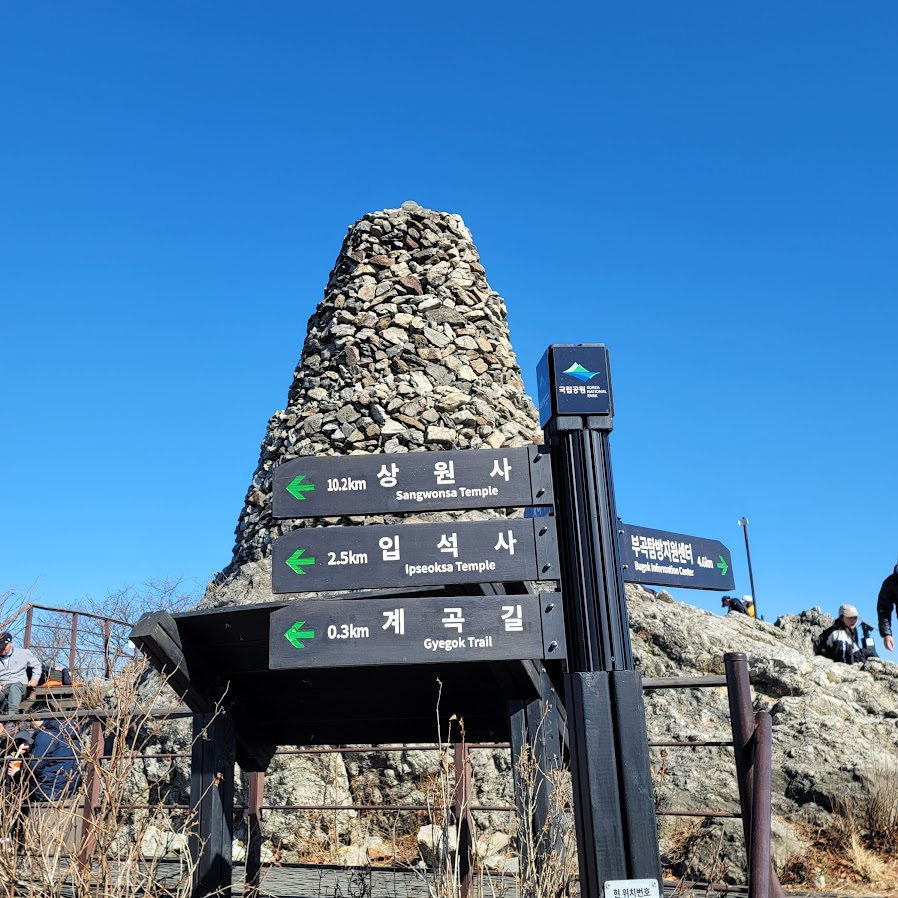
예정대로 사다리병장길로 올라가서 계곡길로 하산했으나
다시 올라가라면 사다리병장길로 왕복한다.
계곡길이 진짜 힘들다.


중간에 전망대가 나왔다가 다시 계단계단


단풍이 한창인 10월 셋째주 설악산 대청봉을 등반
코스는 설악산 소공원 – 비선대 – 천불동계곡 – 희운각대피소 – 소청봉 – 중청대피소 – 대청봉 – (이후 원점복귀)
휴식시간 포함 13시간 소요됨


ALTER USER root@localhost IDENTIFIED VIA mysql_native_password;
SET PASSWORD = PASSWORD('foo');
flush privileges;cd /usr/local/james
./bin/james start./bin/james statusroot@mail:/usr/local/james# ./bin/james status
Apache James :: Server :: Spring :: App is running (22938).
./bin/james stop
./bin/james restarttail -f log/wrapper.log자세한 로그를 얻기위해서는 conf/log4j2.xml 파일을 수정하고 재시작하면 된다. status 속성을 변경한다.
<?xml version="1.0" encoding="UTF-8"?>
<Configuration status="INFO" monitorInterval="30">conf/domainlist.xml 파일에서 도메인을 추가하지 않고 james-cli 명령을 이용해서 추가가 가능하다.
./bin/james-cli AddDomains domain.com도메인을 추가하면 해당 도메인내에서 사용이 가능한 사용자를 추가할 수 있다. 사용자명은 도메인을 포함한 이메일주소여야 한다.
james-cli Adduser <username> <password>
./bin/james-cli AddUser me@jongwan.com 1234./bin/james-cli SetPassword me@jongwan.com abcd1234./bin/james-cli RemoveUser me@jongwan.comroot@mail:/usr/local/james# ./bin/james-cli.sh
You must specify a command.
usage: java org.apache.james.cli.ServerCmd --host <arg> <command>
-h,--host <arg> node hostname or ip address
-p,--port <arg> remote jmx agent port number
AddUser <username> <password>
RemoveUser <username>
ListUsers
AddDomain <domainName>
RemoveDomain <domainName>
ContainsDomain <domainName>
ListDomains
ListMappings
ListUserDomainMappings <user> <domain>
AddAddressMapping <fromUser> <fromDomain> <toAddress>
RemoveAddressMapping <fromUser> <fromDomain> <toAddress>
AddRegexMapping <user> <domain> <regex>
RemoveRegexMapping <user> <domain> <regex>
SetPassword <username> <password>
CopyMailbox <srcBean> <dstBean>
DeleteUserMailboxes <user>
CreateMailbox <namespace> <user> <name>
ListUserMailboxes <user>
DeleteMailbox <namespace> <user> <name>
ImportEml <namespace> <user> <name> <path>
GetStorageQuota <quotaroot>
GetMessageCountQuota <quotaroot>
GetQuotaroot <namespace> <user> <name>
GetMaxStorageQuota <quotaroot>
GetMaxMessageCountQuota <quotaroot>
SetMaxStorageQuota <quotaroot> <maxMessageCount>
SetMaxMessageCountQuota <quotaroot> <maxStorage>
SetGlobalMaxStorageQuota <maxStorage>
SetGlobalMaxMessageCountQuota <maxMessageCount>
GetGlobalMaxStorageQuota
GetGlobalMaxMessageCountQuota
ReindexMailbox <namespace> <user> <name>
ReindexAll
GetSieveQuota
SetSieveQuota <quota>
RemoveSieveQuota
GetSieveUserQuota <username>
SetSieveUserQuota <username> <quota>
RemoveSieveUserQuota <username>
AddActiveSieveScript <username> <scriptname> <path>
메일서버에서 사용하는 도메인을 지정해준다.
아래 설정에서는 두개의 도메인을 사용하는 것을 기준으로 했다.
<?xml version="1.0"?>
<domainlist class="org.apache.james.domainlist.jpa.JPADomainList">
  <autodetect>false</autodetect>
  <autodetectIP>false</autodetectIP>
  <defaultDomain>jongwan.com</defaultDomain>
    <domainnames>
      <domainname>jongwan.com</domainname>
      <domainname>another-domain.com</domainname>
    </domainnames>
</domainlist>DNS 서버를 지정한다. 자동으로 했을 때 문제가 있어 강제로 지정했다.
<?xml version="1.0"?>
<dnsservice>
  <servers>
    <server>1.1.1.1</server>
  </servers>
  <autodiscover>false</autodiscover>
  <authoritative>false</authoritative>
  <maxcachesize>50000</maxcachesize>
</dnsservice>TLS사용을 위해서 키를 생성한다.
smtpserver.xml, imapserver.xml에서 사용한다.
/usr/local/james 위치에 설치기준
keytool -genkey -alias james -keyalg RSA -storetype PKCS12 -keystore /usr/local/james/conf/keystoreEnter keystore password:
Re-enter new password:
What is your first and last name?
[Unknown]: Jongwan Kim
What is the name of your organizational unit?
[Unknown]: None
What is the name of your organization?
[Unknown]: None
What is the name of your City or Locality?
[Unknown]: Seoul
What is the name of your State or Province?
[Unknown]: Guro-gu
What is the two-letter country code for this unit?
[Unknown]: KR
Is CN=Jongwan Kim, OU=None, O=None, L=Seoul, ST=Guro-gu, C=KR correct?
[no]: y
메일 발송을 위한 SMTP 설정을 한다.
25번 포트와 465번 포트설정이 각각 smtpserver 항목으로 있다.
<?xml version="1.0"?>
<smtpservers>
  <smtpserver enabled="true">
    <jmxName>smtpserver</jmxName>
    <bind>0.0.0.0:25</bind>
    <connectionBacklog>200</connectionBacklog>
    <tls socketTLS="false" startTLS="false">
      <keystore>file://conf/keystore</keystore>
      <keystoreType>PKCS12</keystoreType>
      <secret>123456</secret>
      <provider>org.bouncycastle.jce.provider.BouncyCastleProvider</provider>
      <algorithm>SunX509</algorithm>
    </tls>
    <connectiontimeout>360</connectiontimeout>
    <connectionLimit>0</connectionLimit>
    <connectionLimitPerIP>0</connectionLimitPerIP>
    <auth>
      <plainAuthEnabled>true</plainAuthEnabled>
    </auth>
    <authorizedAddresses>127.0.0.0/24, 192.168.0.0/24, 100.100.100.0/24</authorizedAddresses>
    <maxmessagesize>0</maxmessagesize>
    <addressBracketsEnforcement>true</addressBracketsEnforcement>
    <handlerchain>
      <handler class="org.apache.james.smtpserver.fastfail.ValidRcptHandler"/>
      <handler class="org.apache.james.smtpserver.CoreCmdHandlerLoader"/>
    </handlerchain>
  </smtpserver>
  <smtpserver enabled="true">
    <jmxName>smtpservertls</jmxName>
    <bind>0.0.0.0:465</bind>
    <connectionBacklog>200</connectionBacklog>
    <tls socketTLS="false" startTLS="true">
      <keystore>file://conf/keystore</keystore>
      <keystoreType>PKCS12</keystoreType>
      <secret>123456</secret>
      <provider>org.bouncycastle.jce.provider.BouncyCastleProvider</provider>
      <algorithm>SunX509</algorithm>
    </tls>
    <connectiontimeout>360</connectiontimeout>
    <connectionLimit>0</connectionLimit>
    <connectionLimitPerIP>0</connectionLimitPerIP>
    <auth>
      <plainAuthEnabled>true</plainAuthEnabled>
    </auth>
    <authorizedAddresses>127.0.0.0/24, 192.168.0.0/24, 100.100.100.0/24</authorizedAddresses>
    <maxmessagesize>0</maxmessagesize>
    <addressBracketsEnforcement>true</addressBracketsEnforcement>
    <handlerchain>
      <handler class="org.apache.james.smtpserver.fastfail.ValidRcptHandler"/>
      <handler class="org.apache.james.smtpserver.CoreCmdHandlerLoader"/>
    </handlerchain>
  </smtpserver>
</smtpservers>IMAP 사용을 위해서 143, 993 포트 설정을 한다.
imapserver 항목으로 추가가 가능하다.
<?xml version="1.0"?>
<imapservers>
  <imapserver enabled="true">
    <jmxName>imapserver</jmxName>
    <bind>0.0.0.0:143</bind>
    <connectionBacklog>200</connectionBacklog>
    <tls socketTLS="false" startTLS="false">
      <keystore>file://conf/keystore</keystore>
      <keystoreType>PKCS12</keystoreType>
      <secret>123456</secret>
      <provider>org.bouncycastle.jce.provider.BouncyCastleProvider</provider>
    </tls>
    <connectionLimit>0</connectionLimit>
    <connectionLimitPerIP>0</connectionLimitPerIP>
    <plainAuthDisallowed>false</plainAuthDisallowed>
    <auth>
      <plainAuthEnabled>true</plainAuthEnabled>
    </auth>
  </imapserver>
  <imapserver enabled="true">
    <jmxName>imapservertls</jmxName>
    <bind>0.0.0.0:993</bind>
    <connectionBacklog>200</connectionBacklog>
    <tls socketTLS="false" startTLS="true">
      <keystore>file://conf/keystore</keystore>
      <keystoreType>PKCS12</keystoreType>
      <secret>123456</secret>
      <provider>org.bouncycastle.jce.provider.BouncyCastleProvider</provider>
    </tls>
    <connectionLimit>0</connectionLimit>
    <connectionLimitPerIP>0</connectionLimitPerIP>
    <plainAuthDisallowed>false</plainAuthDisallowed>
    <auth>
      <plainAuthEnabled>true</plainAuthEnabled>
    </auth>
  </imapserver>
</imapservers>
POP3는 사용하지 않는다.
<?xml version="1.0"?>
<pop3servers>
  <pop3server enabled="false"
</pop3servers>메일 송/수신관련된 복잡한 설정이 있다.
<?xml version="1.0"?>
<mailetcontainer enableJmx="true">
  <context>
    <postmaster>me@jongwan.com</postmaster>
  </context>
  <spooler>
    <threads>20</threads>
    <errorRepository>file://var/mail/error/</errorRepository>
  </spooler>
  <processors>
    <processor state="root" enableJmx="true">
      <mailet match="All" class="PostmasterAlias"/>
      <mailet match="RelayLimit=30" class="Null"/>
      <mailet match="HasMailAttribute=spamChecked" class="ToProcessor">
        <processor>transport</processor>
      </mailet>
      <mailet match="All" class="SetMailAttribute">
        <spamChecked>true</spamChecked>
      </mailet>
      <mailet match="SMTPAuthSuccessful" class="ToProcessor">
        <processor>transport</processor>
      </mailet>
      <mailet match="All" class="ToProcessor">
        <processor>transport</processor>
      </mailet>
    </processor>
    <processor state="error" enableJmx="true">
      <mailet match="All" class="ToRepository">
        <repositoryPath>file://var/mail/error/</repositoryPath>
      </mailet>
    </processor>
    <processor state="transport" enableJmx="true">
      <mailet match="SenderIsRegex=(.*)@jongwan\.com" class="org.apache.james.jdkim.mailets.DKIMSign">
        <signatureTemplate>v=1; s=mail; d=jongwan.com ; h=from : reply-to : subject : date : to : cc : resent-date : resent-from : resent-sender : resent-to : resent-cc : in-reply-to : references : list-id : list-help : list-unsubscribe : list-subscribe : list-post : list-owner : list-archive; a=rsa-sha256; bh=; b=;</signatureTemplate>
        <privateKey>
-----BEGIN RSA PRIVATE KEY-----
# 여기에 Private Key 입력
-----END RSA PRIVATE KEY-----
        </privateKey>
      </mailet>
      <mailet match="SenderIsRegex=(.*)@another-domain\.com" class="org.apache.james.jdkim.mailets.DKIMSign">
        <signatureTemplate>v=1; s=mail; d=another-domain.com ; h=from : reply-to : subject : date : to : cc : resent-date : resent-from : resent-sender : resent-to : resent-cc : in-reply-to : references : list-id : list-help : list-unsubscribe : list-subscribe : list-post : list-owner : list-archive; a=rsa-sha256; bh=; b=;</signatureTemplate>
          <privateKey>
-----BEGIN RSA PRIVATE KEY-----
# 여기에 Private Key 입력
-----END RSA PRIVATE KEY-----
        </privateKey>
      </mailet>
      <mailet match="SMTPAuthSuccessful" class="SetMimeHeader">
        <name>X-UserIsAuth</name>
        <value>true</value>
        <onMailetException>ignore</onMailetException>
      </mailet>
      <mailet match="HasMailAttribute=org.apache.james.SMIMECheckSignature" class="SetMimeHeader">
        <name>X-WasSigned</name>
        <value>true</value>
        <onMailetException>ignore</onMailetException>
      </mailet>
      <mailet match="All" class="RecipientRewriteTable" />
      <mailet match="RecipientIsLocal" class="Sieve"/>
      <mailet match="RecipientIsLocal" class="AddDeliveredToHeader"/>
      <mailet match="RecipientIsLocal" class="LocalDelivery"/>
      <mailet match="HostIsLocal" class="ToProcessor">
        <processor>local-address-error</processor>
        <notice>550 - Requested action not taken: no such user here</notice>
      </mailet>
      <mailet match="All" class="RemoteDelivery">
        <outgoing>outgoing</outgoing>
        <startTLS>true</startTLS>
        <mail.smtp.ssl.trust>*</mail.smtp.ssl.trust>
        <delayTime>5000, 100000, 500000</delayTime>
        <maxRetries>3</maxRetries>
        <maxDnsProblemRetries>0</maxDnsProblemRetries>
        <deliveryThreads>10</deliveryThreads>
        <sendpartial>true</sendpartial>
        <bounceProcessor>bounces</bounceProcessor>
      </mailet>
    </processor>
    <processor state="over-quota" enableJmx="true">
      <mailet match="All" class="MetricsMailet">
        <metricName>mailet-over-quota-error</metricName>
      </mailet>
      <mailet match="All" class="Bounce">
        <message>The following recipients do not have enough space for storing the email you sent them.</message>
        <attachment>none</attachment>
      </mailet>
      <mailet match="All" class="ToRepository">
        <repositoryPath>file://var/mail/over-quota-error/</repositoryPath>
      </mailet>
    </processor>
    <processor state="spam" enableJmx="true">
      <mailet match="All" class="ToRepository">
        <repositoryPath>file://var/mail/spam/</repositoryPath>
      </mailet>
    </processor>
    <processor state="virus" enableJmx="true">
      <mailet match="All" class="SetMailAttribute">
        <org.apache.james.infected>true, bouncing</org.apache.james.infected>
      </mailet>
      <mailet match="SMTPAuthSuccessful" class="Bounce">
        <inline>heads</inline>
        <attachment>none</attachment>
        <notice>Warning: We were unable to deliver the message below because it was found infected by virus(es).</notice>
      </mailet>
      <mailet match="All" class="Null" />
    </processor>
    <processor state="local-address-error" enableJmx="true">
      <mailet match="All" class="ToRepository">
        <repositoryPath>file://var/mail/address-error/</repositoryPath>
      </mailet>
    </processor>
    <processor state="relay-denied" enableJmx="true">
      <mailet match="All" class="ToRepository">
        <repositoryPath>file://var/mail/relay-denied/</repositoryPath>
      </mailet>
    </processor>
    <processor state="bounces" enableJmx="true">
      <mailet match="All" class="DSNBounce">
        <passThrough>false</passThrough>
      </mailet>
    </processor>
  </processors>
</mailetcontainer>
기본설정에서 변경된 부분만 설명한다.
<mailet match="SenderIsRegex=(.*)@jongwan\.com" class="org.apache.james.jdkim.mailets.DKIMSign">
  <signatureTemplate>v=1; s=mail; d=jongwan.com ; h=from : reply-to : subject : date : to : cc : resent-date : resent-from : resent-sender : resent-to : resent-cc : in-reply-to : references : list-id : list-help : list-unsubscribe : list-subscribe : list-post : list-owner : list-archive; a=rsa-sha256; bh=; b=;</signatureTemplate>
  <privateKey>
-----BEGIN RSA PRIVATE KEY-----
# 여기에 Private Key 입력
-----END RSA PRIVATE KEY-----
  </privateKey>
</mailet>
DKIM 설정을 위해서 <processor state=”transport”> 항목의 가장위에 추가한다.
도메인별로 키가 다르므로 match=”SenderIsRegex=…” 를 사용해서 발송시 도메인별로 헤더를 다르게 추가해준다.
<mailet match="All" class="RemoteDelivery">
  ...
  <startTLS>true</startTLS>
  <mail.smtp.ssl.trust>*</mail.smtp.ssl.trust>
  ...
</mailet>
위처럼 암호화관련 경고나 나오면 <startTLS>true</startTLS>를 추가한다.

직접 생성한 인증서를 사용해서 경고가 나올 경우 <mail.smpt.ssl.trust>*</mail.smpt.ssl.trust> 항목을 추가한다.
<mailet match="RemoteAddrNotInNetwork=127.0.0.1" class="ToProcessor">
  <processor>relay-denied</processor>
  <notice>550 - Requested action not taken: relaying denied</notice>
</mailet>
이 규칙이 있으면 외부로 메일이 발송되지 않는다.
내부메일서버로만 사용한다면 놔두고, 외부로 메일발송이 필요하다면 주석처리해야한다.
Java로 만들어진 메일서버로 아파치의 지원을 받는다.
기존에 시스템은 Postfix로 구축했었는데,
다른 오픈소스를 찾다보니 James를 테스트 해보기로 했다.
최신버전인 James 3.7.0은 OIpenJDK 11버전이 필요하다.
서버는 Ubuntu 20.04.4 LTS 를 VM으로 생성 (CPU*4, 2Gb Memory)
설치요구사항 확인
https://james.apache.org/server/install.html
apt update
apt install openjdk-11-jdk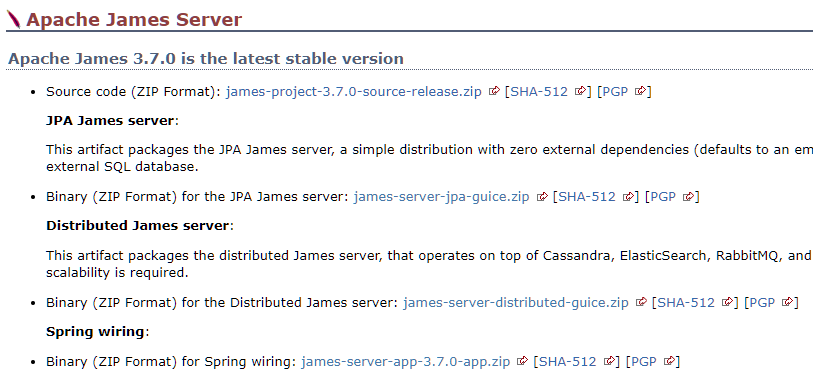
Spring wiring 바이너리를 다운로드한다https://dlcdn.apache.org/james/server/3.7.0/james-server-app-3.7.0-app.zip
cd /usr/local/
wget https://dlcdn.apache.org/james/server/3.7.0/james-server-app-3.7.0-app.zip# unzip 설치
apt install unzip
# 압축해제
unzip james-server-app-3.7.0-ap.zip
# 폴더이름변경
mv james-server-spring-app-3.7.0 james