asterisk 11.7.0 소스 컴파일 및 라이브러리 설치 등

asterisk 11.7.0 소스 컴파일 및 라이브러리 설치


asterisk 11.7.0 을 설치하기 위해 소스를 다운로드하고 컴파일을 합니다.

홈페이지는 http://www.asterisk.org/ 이곳이며,

현재 공식버전은 13 까지 나왔습니다만, 여기서는 11.7을 기준으로 합니다.
 

asterisk 11.7.0


1. asterisk 11.7.0 다운로드

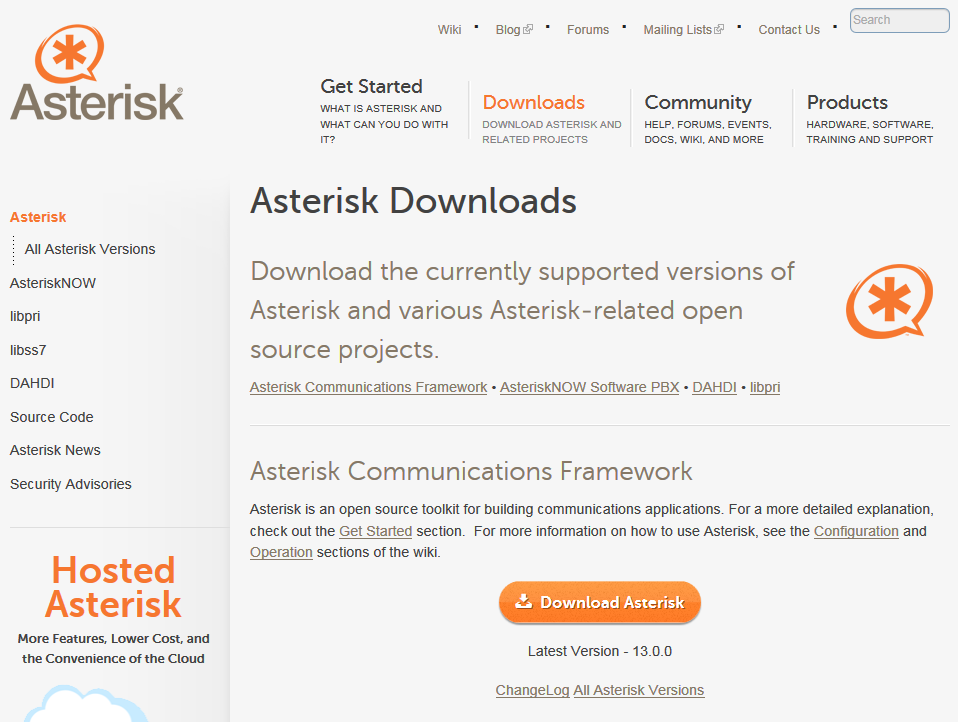
모든 버전의 asterisk를 확인하기 위해서 다운로드 페이지의 All Asterisk Versions 를 클릭합니다.

http://www.asterisk.org/downloads/asterisk/all-asterisk-versions

필요한 버전을 찾아 설치할 서버에 다운로드 합니다.


#cd /usr/local/src

#wget http://downloads.asterisk.org/pub/telephony/asterisk/asterisk-11-current.tar.gz

#tar xfzp asterisk-11-current.tar.gz


2. 설치시 필요한 패키지 추가설치

apt-get install ncurses-base ncurses-bin ncurses-term libncurses5-dev

apt-get install libxml2 libxml2-dev

apt-get install sqlite3 libsqlite3-dev


3. 소스 컴파일

#./configure

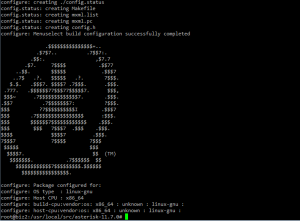
asterisk2

이렇게 나오면 성공~

#make

#make install

+—- Asterisk Installation Complete ——-+
+ +
+ YOU MUST READ THE SECURITY DOCUMENT +
+ +
+ Asterisk has successfully been installed. +
+ If you would like to install the sample +
+ configuration files (overwriting any +
+ existing config files), run: +
+ +
+ make samples +
+ +
+—————– or ———————+
+ +
+ You can go ahead and install the asterisk +
+ program documentation now or later run: +
+ +
+ make progdocs +
+ +
+ **Note** This requires that you have +
+ doxygen installed on your local system +
+——————————————-+

#make samples


4. 시작

#asterisk -cvvv


5. /etc/init.d/asterisk 서비스 등록

설치폴더에 보면 contrib/init.d/ 가 있는데 살펴보면 rc.debian.asterisk 파일이 있다

이 파일을 /etc/init.d/로 복사를 한다.

#cp contrib/init.d/rc.debian.asterisk /etc/init.d/asterisk

#chmod 755 /etc/init.d/asterisk

#/etc/init.d/asterisk start


asterisk 11 운영을 위한 Ubuntu 12.10 설치

asterisk 환경을 위한 우분투 12.10 설치


asterisk-ubuntu


asterisk를 Centos 5.x, Centos 6.3, ubuntu 12.10 등에 설치해 보았는데

패키지로 설치하기에는 우분투 12.10 의 apt-get 이 너무 편했으므로 우분투로 운영을 하기로 했습니다.

기존 centos만 사용하다가 우분투로 패키지 관리를 하니 신세계네요


1. 우분투 12.10 LTS 파일 받기

– http://ftp.daum.net/ubuntu-releases/12.10/ubuntu-12.10-server-amd64.iso

– 위 경로로 iso 파일을 받아 CD로 굽거나 부팅가능한 USB를 생성시켜준다. USB 생성시에는 아래 URL에서 프로그램을 다운받아 사용해도 된다.

http://www.pendrivelinux.com/universal-usb-installer-easy-as-1-2-3/

– OPENSSH, LAPM 패키지만 선택 후 설치를 진행

– 설치시에는 한국어 지원을 선택하지 않았습니다. 개발을 UTF-8 환경으로 하기 때문에 필요가 없었습니다.


2. root 로 접속하기 위해서 비번변경, 접속

– sudo passwd root

– logout


3. ssh 포트 변경

– 기본포트인 22번을 그냥 놔두면 귀찮은 일이 생기므로 일단 변경한다.

– vim /etc/ssh/sshd_config

– Port 2222

– /etc/init.d/ssh restart

– 방화벽에 해당 포트를 등록합니다.

#ufw allow 2222


4. 리눅스 사용자/그룹 추가

– groupadd erpgroups -g 1002

– useradd asterisk -u 1001 -g 1002


5. 추가 패키지 설치

– asterisk 운영과 함께 개발한 그룹웨어를 운영하기 위한  부분으므로 생략 가능합니다.

– apt-get install build-essential

– apt-get install imagemagick

– apt-get install php-pear php5-mcrypt php5-dev

– php용 메일파서(mailparse) 설치

a) wget http://pecl.php.net/get/mailparse-2.1.6.tgz

b) cd mailparse-2.1.6

c) phpize

d) make && make install

e) vim /etc/php5/mods-available/mailparse.ini

+ 아래 내용 추가

+ extension=mailparse.so

f) cd /etc/php5/conf.d

g) in -s ../mods-available/mailparse.ini 30-mailparse.ini

+ 링크명을 30-mailparse.ini 으로 하는 이유는 해당 익스텐션을 가장 마지막에 로드하기 위해서이다. 30- 은 적절하게 늘려야한다.

+ mailparse 라이브러리가 사용하는 함수가 있는데, 메일파서가 먼저 로드되면 해당 라이브러리를 찾을 수 없다는 오류가 발생하여 php가 중단된다

6. 아파치 설정

– apache2.conf를 열어서 ServerName abc.domain.com 추가(해당 시스템에 맞는 도메인을 추가)합니다.

– vim /etc/apache2/envvars

a) export APACHE_RUN_USER=asterisk

b) export APACHE_RUN_GROUP=erpgroups

apt-get update :: Err http://kr.archive.ubuntu.com/…

우분투에서 apt-get update 를 실행했는데,

Err http://kr.archive.ubuntu.com/ubuntu/dists/….

W: Failed to fetch http://security.ubuntu.com/…

이런 오류가 출력된다면 /etc/apt/sources.list 파일을 수정한다.


우분투 버전이 14.10 이상 나온 시점에서 12.10을 사용하려니 이런 오류가 나오는 것 같다

지금 시점에서는 12.10은 old-releases 이니깐


1. 기존 파일 백업

# cd /etc/apt

# cp sources.list sources.list.bak


2. URL을 수정해준다

# sed -i ‘s,http://.*ubuntu.com,http://old-releases.ubuntu.com,g’ sources.list


3. apt-get update

패키지 업데이트를 다시한다.

# apt-get update

lftp를 이용한 백업과 미러링(mirror), 한글파일명 전송

rsync를 이용해서 미러링이 불가능한 상황에 lftp를 사용해서 미러링이 가능하여 찾아보았다.


아래와 같이 디렉토리가 있다 가정한 상황에서

A서버의 /home/source_dir

B서버의 /home/target_dir


1. A서버 -> B서버로 mirror, A서버에서 실행

lftp -u (username) ftp://(address) (-p포트) -e “mirror –reverse /home/source_dir /home/target_dir”


2. A서버 -> B서버로 mirror, B서버에서 실행

lftp -u (username) ftp://(address) (-p포트) -e “mirror /home/source_dir /home/target_dir”


3. 옵션

–delete 리모트 사이트에 없는 파일은 삭제한다

–only-existing 타겟 사이트에 존재하는 파일만 다운로드한다

–only-newer 새로운 파일만 다운로드한다

–no-recursion 서브디렉토리를 무시한다

-reverse 역방향 mirror


4. 한글문제(euc-kr)

utf-8 환경에서 한글파일명을 전송할 경우 문제가 발생되었다.

해결을 위해서 /etc/lftp.conf 파일을 수정한다.

man lftp 로 찾아보면 아래와 같은 설정이 있다.

set file:charset utf-8
set ftp:charset euc-kr

위 두줄을 /etc/lftp.conf 파일에 추가해준다.

퍼미션 변환

리눅스 설치후 보안을 위해서
퍼미션을 변경할 파일들

chmod 100 /usr/bin/top
chmod 660 /var/log/xferlog*
chmod 100 /usr/bin/w
chmod 660 /var/log/yum.log
chmod 100 /usr/bin/uptime
chmod 700 -R /etc/rc.d/
chmod 100 /usr/bin/last
chmod 700 -R /etc/cron.*
chmod 100 /usr/bin/free
chmod 640 /etc/fstab
chmod 100 /usr/bin/find
chmod 640 /etc/redhat-release
chmod 100 /bin/ping
chmod 640 /etc/proftpd.conf
chmod 100 /bin/netstat
chmod 640 /etc/crontab
chmod 100 /sbin/ifconfig
chmod 640 /etc/logrotate.conf
chmod 700 /proc/
chmod 640 -R /etc/xinetd.d/
chmod 700 /boot/
chmod 640 -R /etc/logrotate.d/
chmod 700 /usr/src/
chmod 640 /etc/lilo.conf
chmod 700 /usr/local/src/
chmod 640 -R /etc/snmp*
chmod 701 /www/
chmod 640 /etc/yum.conf
chmod 640 /var/log/dmesg
chmod 640 -R /etc/proftpd/
chmod 640 /var/log/ksyms*
chmod 640 /etc/snmpd.conf
chmod 640 /var/log/rpmpkgs*
chmod 640 /etc/rsyncd.conf
chmod 640 /var/log/snmpd.log*
chmod 640 /etc/xinetd.conf
chmod 660 /var/log/wtmp*
chmod 640 /etc/inetd.conf

ImageMagicK watermark(워터마크)

ImageMagicK 를 이용해서 이미지에 워터마크를 찍어보자

1. 설치
yum install imagemagick

2. 리사이즈
convert -resize 800×600 input.jpg output.jpg
convert -resize 800x input.jpg output.jpg
convert -reisze x600 input.jpg output.jpg
convert -resize 800×600! input.jpg output.jpg (느낌표(!) 사용시 강제로 사이즈 맞춤)

3. 워터마크
(투명도 30%, 이미지 가운데, watermark.png 이용)
composite -watermark 30% -gravity center watermark.png input.jpg output.jpg

CentOS 5.5 네트워크 설치

CentOS 5.5 네트워크 설치방법입니다.
VMware Wrokstation 에서 설치하는 것을 기준으로 합니다.

1. http://ftp.daum.net/centos/5.5/isos/x86_64/

CentOs-5.5-x86_64-netinstall.iso 를 다운로드한다.


2. VMware CD-ROM 설정에서 다운받은 iso 파일을 마운트 시킨다


3. VMware 를 시작해준다


[F2-Options] 를 선택한다


네트워크 설치를 위해서
linux askmethod 를 입력한뒤 엔터를 눌러준다


언어/키보드 설정을 한다


네트워크 설치이므로 HTTP를 선택한다


각 환경에 맞게 값을 입력한다
공유기를 사용중이므로 DHCP에서 할당되는 값을 지정해줬다

192.168.123.190 / 255.255.255.0


Web site name : ftp.daum.net
CentOs directory : /centos/5.5/os/x86_64 (/os/ 부분을 주의!!!)

이후 진행은 별다른게 없다~


파일 인코딩 일괄변환

해당 디렉토리내 모든파일 ( 서브 디렉토리 포함 ) 의 인코딩을 변경합니다.
from / to 변수를 바꿔줘서 utf8 -> euckr, euckr -> utf8 으로 변경이 가능합니다.

-name “*.php” -or -name “*.html” -or -name “*.css” -or -name “*.js”
이부분을 수정하시면 원하시는 확장자만 변환을 시킵니다.

주의) 두번 실행하면 모든 파일이 *.tmp 로 복사됩니다.

============================================================================

#!/bin/sh


// encoding
from=”euckr”
to=”utf8″


// search files
target_dir=”.”
target_files=$(find $target_dir -type f \( -name “*.php” -or -name “*.html” -or -name “*.css” -or -name “*.js” \))


for file in $target_files;do
    echo “file : $file”
    iconv -c -f=$from -t=$to $file > $file.tmp && mv -f $file.tmp $file
done


exit 0